Saturday, December 28, 2013
Summer 2013 Internship --- New Addition to Modeling Portfolio!
For my modeling portfolio, I finally added images of the houses I worked on during my internship.
During this past summer I worked at the IRC (Imaging Research Center) to model historic Baltimore houses for a virtual exhibit about the War of 1812. The exhibit is soon to be put on display by a Maryland historic society.
I modeled them in Maya and based their scale off of the exact measurements from maps and architectural schematics. This project was a lot of fun because of the history involved! Learning about the significance of each area in Baltimore and the respective houses was fascinating.
In the future, I might decided to texture the buildings and add an environment.
Wednesday, December 25, 2013
November 1st -- 2D Animation
"November 1st" is a short animation that I created. It follows a boy walking through his neighborhood until something catches his eye.
The boy's cycles were animated on pencil and paper. The character was inked and colored in Photoshop and Illustrator.
The backgrounds were images that consisted of houses, trees, and a street that were modeled in Maya, and a far background matte that was painted in Photoshop.
The foreground elements (pumpkin bag and candy) were created in Illustrator and Photoshop.
All of the background and foreground elements were then composited in After Effects.
Labels:
2D,
3D,
After Effects,
Animation,
audio,
buildings,
CGI,
Final Project,
hand drawn,
houses,
Portfolio
Sunday, December 8, 2013
Updated Soldier Sculpt
Since my last post, I have revised my sculpt to be more proportional and to have more accurate armor detailing.
Monday, November 11, 2013
Alien Soldier --- Project "EMT Merci"
I am currently involved with UMBC's Game Developer's Club. I joined a 3D mobile game project called "EMT Merci". EMT Merci is a space game in which the player is a medic who heals human marines during combat.
As a 3D character artist, I was tasked with designing concept art, modeling, and texturing a class of enemies. This enemy is a work in progress and I expect it to be completed in December.
I used Zbrush to sculpt the mesh from Zspheres.
Wednesday, September 18, 2013
Dilophosaurus Rig
I am currently working on a dinosaur rig. The dinosaur in question is the dilophosaurus.
I decided to attempt this project so that I could improve my modeling, rigging, and animation skills.
With Maya, I modeled the body, eyes, and teeth.
I used Photoshop to texture the eyes, Mudbox to paint the body, and CrazyBump to generate the bump map.
I plan on rigging the model and creating some animations: walk cycles, a short film, etc. I am considering including it in my senior project.
 |
| Diffuse map from Mudbox |
 | |
| Scales stencil layer from Mudbox |
 |
| Bump map based off of stencils image |
 |
| source: http://dinosaurs.about.com/od/dinosaurpictures/ig/Dilophosaurus-Pictures/Dilophosaurus.-43o.htm |
Sunday, June 23, 2013
CG Clouds
A recent mini-project of mine was to create clouds in Maya. I achieved it by creating a fluids container and toggling with the textures and shading attributes.
I then used the expression fluidShape1.textureOriginZ=time*.02 to animate the clouds.
I rendered the sequence as .JPGs and then composited them in After Effects.
Labels:
3D,
3D Animation,
adobe,
After Effects,
Animation,
CGI,
Maya
Friday, May 24, 2013
Final Project--A Character Animation
My final project for my Advanced 3D class at UMBC was to animate the character rig that I've been working on for the semester. Above is the final, fully rendered, result.
Steps for creating it:
1) I extracted audio from the film Born In Flames (1983) for the soundclip.
Here is the portion I used.
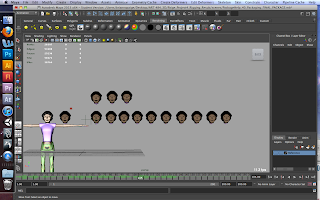
2) I imported the audio and used my character's blendshapes to lip synch with the audio.
3) Once all of my lip synching has been completed, I modeled a simple microphone to use as a prop and for eye-tracking purposes.
4) I then animated the character's torso, head (head, neck, eyes), lower body, and arms.
5) My next step was to create a scene and render it. I created the radio station using Photoshop and bumpmapped it using Crazybump.
6) I added lighting and arranged the wall textures for the final scene.
 7) Lastly, I batch rendered the scene as .PNG files and then composited the images with the audio in After Effects.
Labels:
3D,
3D Animation,
After Effects,
Animation,
CGI,
Final Project,
human,
keying,
Maya,
Models,
Recent work,
rigging
Subscribe to:
Posts (Atom)


